My Lakefront Container Cabin: Upcycled Charm on a Budget
If you think transforming a shipping container into a livable dwelling is out of reach, think again. Lakefront cabin is living proof that you can create something beautiful and functional without breaking the bank. Excited to share detailed build process, the real costs involved, and those hard-earned lessons that will save you time and hassle.
Project Philosophy: Repurpose, Reuse, Recycle
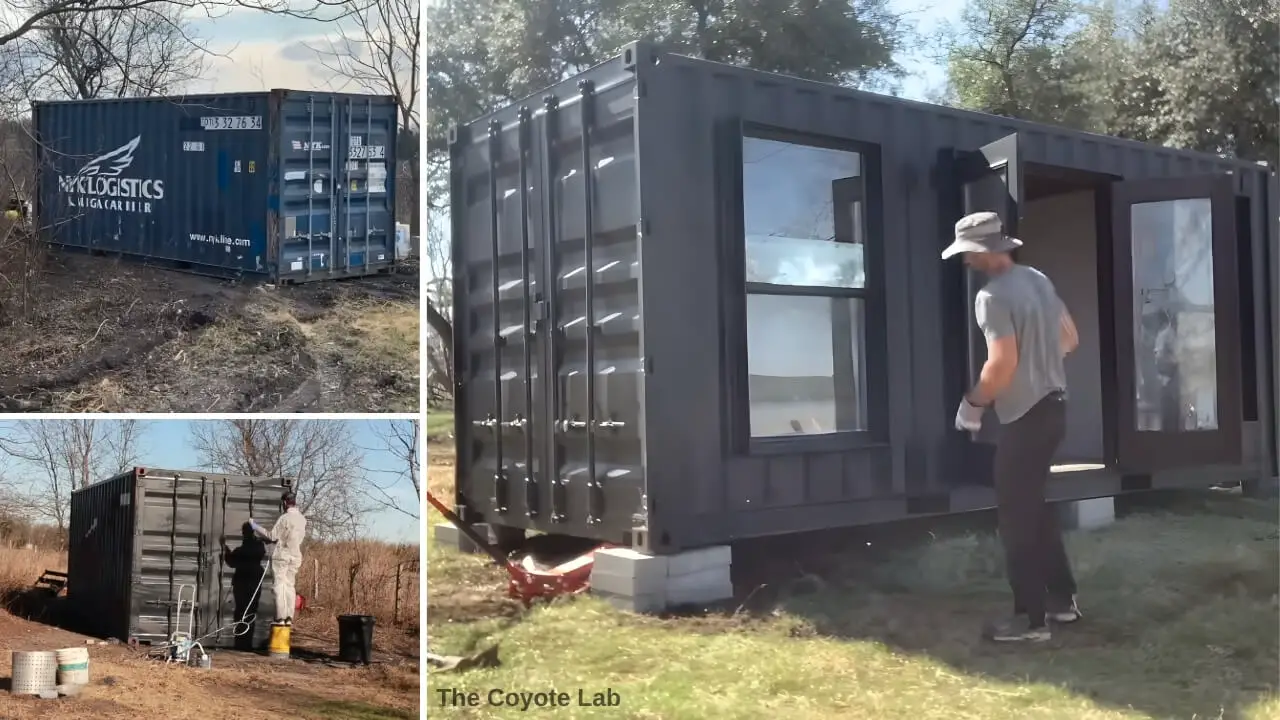
- The container: The foundation of project was a used shipping container. This saved a ton of money and kept a massive chunk of metal out of a landfill.
- Salvaged treasures: Windows and doors were sourced from salvage yards. Yes, they needed TLC, but the savings were significant compared to buying new.
- Upcycling mindset: From building materials to decor, looked for opportunities to repurpose and give items a new life in cabin.
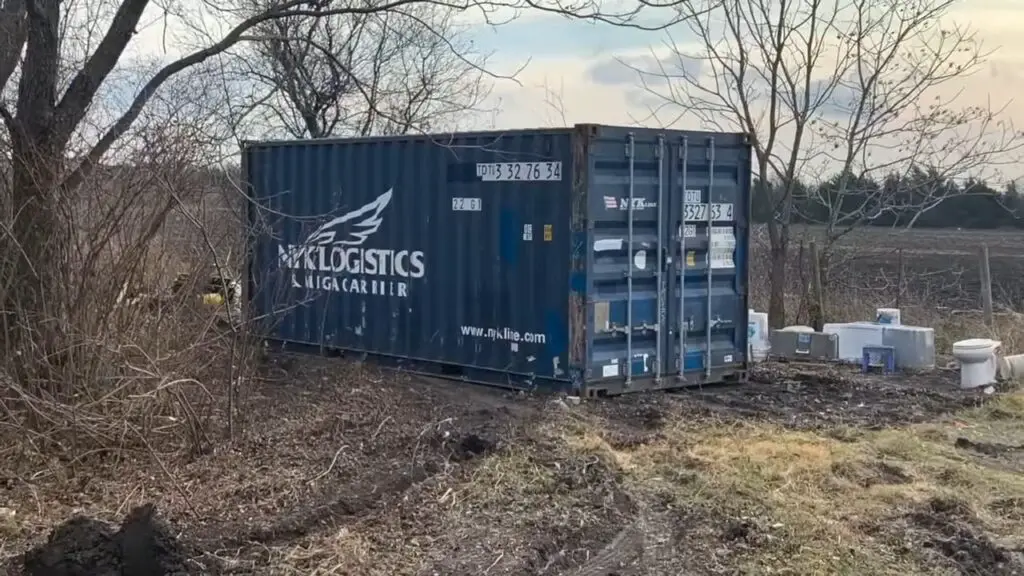
Step 1: Container Prep (It’s About More Than Paint)
Cost: ~$300
- The sticker saga: Those manufacturer’s stickers are tougher than they look! Removing them was a pain, and they still showed through multiple layers of paint. Lesson learned: Remove them FIRST.
- Clean machine: A thorough power washing is essential for good paint adhesion.
- Cool roof: Elastomeric roof coating is a must-have. It keeps the container cooler and prevents leaks – something he learned the hard way on a previous container build.
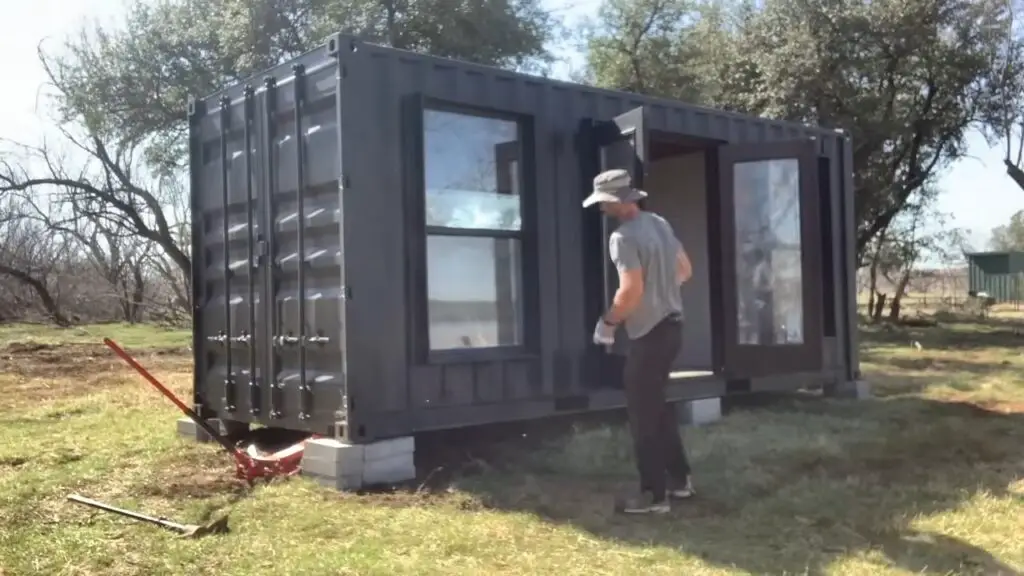
Step 2: Windows and Doors – Angle Iron Saves the Day
Cost: ~$750 ($300 for salvaged doors/windows, $250 steel for frames, $200 for wood supports)
- The right cut: An angle grinder with a cutoff wheel is your best bet for cutting container walls. Those corrugations make a jigsaw a less-than-ideal option.
- Angle iron advantage: This material works perfectly for frames as it closely matches the container’s metal thickness for easier welding. It’s also more forgiving than square tubing if your cuts aren’t laser-precise.
- Inner supports: Added treated wood inside the window openings for stability and a touch of rustic charm.
Step 3: Welding and Sealing Like a Pro
- Welding woes: Working inside a 20-foot container is tight! Be prepared for awkward positions, especially if you’re doing this solo.
- Frame alignment: Ensure your frames sit flush with the corrugations to avoid a crooked installation.
- Seal the deal: A generous bead of polyurethane caulk (or another weatherproof sealant) around your frames is essential to keep the elements out.
Step 4: Painting Blunders and a Change of Plans
- Oops, painted too soon: In eagerness, he painted the container before cutting out the window and door openings. This meant welding work later damaged the new paint job – a definite do-over.
- Quality matters: Don’t skimp on your exterior paint and primer. You want something that will withstand the elements and last.
The Cost Breakdown
Here’s where money went. Keep in mind, these don’t include things like land, foundation, utilities, and interior furnishings:
Container: $3500
Doors/Windows: $300
Framing: $450
Lumber: $400
Insulation: $400
Paint/Primer: $300
Misc.: $500
Air conditioner: $200
TOTAL : $6050
Lessons Learned – So You Don’t Have To
Order of operations matters: Paint AFTER you cut your door and window openings.
Stickers are stubborn: Remove those decals first. Trust me.
Embrace the imperfect: Shipping containers are rarely perfectly square. Be prepared to work around irregularities and get creative with solutions.
It’s all in the prep: A well-prepped container will make your paint job last way longer.
Creating your personal retreat is an achievable dream. With resourcefulness, some sweat equity, and the willingness to learn as you go, you can build something truly special, just like lakefront shipping container cabin!
FAQ: Your DIY Shipping Container Cabin Questions Answered
Q: How much does a project like this cost?
A: Costs vary based on materials, location, if you DIY, etc. However, build provides a rough cost breakdown:
- Container: $3500
- Doors/Windows: $300
- Framing: $450
- Lumber: $400
- Insulation: $400
- Paint/Primer: $300
- Misc: $500
- Air Conditioner: $200
Remember, your budget also needs to factor in land, foundation, utilities, and interior furnishings.
Q: Can I really do this myself?
A: Absolutely! A good amount of the work can be tackled with basic DIY skills. That said, some tasks (like major welding or electrical) might require hiring a professional for safety and to ensure everything meets code.
Q: Where do I find a used shipping container?
A: There are several places to look:
- Online marketplaces (Facebook Marketplace, Craigslist, etc.)
- Shipping container resellers
- Local industrial or construction companies
Q: What are the biggest challenges in a container build?
A: Here are some of the common challenges to be aware of:
- Weatherproofing: Sealing all seams and around door/window frames is crucial to prevent leaks.
- Insulation: Containers get hot and cold easily. Proper insulation is a must for comfort.
- Building permits: Check your local regulations before starting your project.
Q: Should I paint the container before or after cutting openings?
A: Definitely after! Welding or cutting after painting will damage the finish and create more work.
Q: What’s the best way to cut into a shipping container? A: An angle grinder with a cutoff wheel is the most efficient tool, especially when cutting over the corrugations. A jigsaw can work but is slower and less precise.